


 Order Status & Returns
 Gift Cards
 Help Center
 1-800-345-4545

 Vehicle Info Needed
CHASSIS ENGINEERING INC.PART NUMBER: 141-AS-1020CG
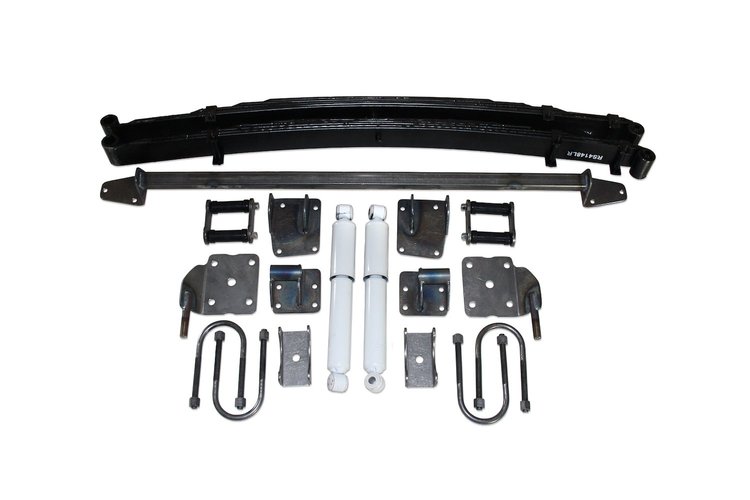
AS-1020CG Complete Rear End Mounting Kit for 1940 Chevy (Gas Shocks)
$99700
 Ships on 09/18/2026
 Lowest Price Guarantee
GM
- Complete Rear End Mounting Kit
- For 1940 Chevy (Gas Shocks)
Chassis Engineering AS-1020CG Features:
AS-1020CG Complete Rear End Mounting Kit for 1940 Chevy (Gas Shocks)
Bolt on kit for the 1940 Chevy car. kit fits a wide variety of rear ends (up to 3" axle housing Diameter) depending upon the off set of wheels and tire choice . We recommend aprrox. 58-60" for 1940. Specify rear end.
This Kit Includes:
- Chassis Engineering 2-1/2" slider springs
- Front and rear spiring mounts
- Shackles
- U-bolts
- Spring pads
- Shock mounting Kit
- New gas shocks
- Hardware
- Instructions
Installation Instructions:

AS-1020CG 1940 Chevy Leaf Spring Rear End Kit
1. Remove original rear end, springs and shocks. Remove original spring mounts and rivets. Both front and rear. Be careful as the holes are reused.
2. Clamp front spring mounts to frame. Match holes with original spring mount holes. The spring mount tabs go to the rear and inside. Note that Chevrolet will not always exactly match the holes in the new mounts so at this point check to make sure the spring mounts are aligned with each other (front to back) and that your wheels are in the center of the fender opening. Do this by installing springs at front mount and then attaching rear end to springs. Be sure car is safely supported by jack stands. Install wheels and tires and visually check for centering. If needed, make any adjustments to the front mounts now. Do not neglect this check. Drill mounting holes to 3/8€ and install bolts.
3. Bolt new rear mounts to frame. Use original spring bracket holes for mounting. Drill rivet holes out to 3/8 in. and install bolts. Note: the gas tank flange will normally just clear, but check clearance to avoid possible rattles. The shackle mount goes to the rear and inside.
Rear Shock Kit:
4. Clamp upper shock mount to frame in location shown. Tube goes between frame rails, not below. Use 28€ measurement at starting point only. Clamp shock bar into place using this dimension and check clearances before drilling. Drill frame holes to 3/8€ and bolt upper mount in place.
5. Bolt springs in place. Front uses stock bushing, rear is empty to accept shackle. Install shackles.
6. The spring retainer can be used with shock mount angled up (for normal kit use) or down (for low riders). Spring retainer is installed with shock stud forward to the center and pointed to the rear.
To complete:
7. Install stock rubber spring pads in rear end (Nova only) and set rear end in place over spring bolt. Install bottom rubber spring pad (Nova only) and lower spring retainer. Note: springs have a spacer installed on the spring center bolt. This is needed for Nova type rear ends only. If it interferes on other rear ends, it can be removed.
8. Slip U-bolts over axle and bolt unit together. Install shocks and tighten all bolts.
9. Now go back and check for loose bolts, pieces fitting right, parts rubbing on other parts and give everything a general overview for correct operation. Be sure rear end bottoms on a rebound rubber (AU-0082) and not on shocks. If car bottoms on shocks then sooner or later something will break. Rebound rubber installation is the responsibility of the installer. These parts are not included in the kit.

Springs:
New springs will normally drop up to an in. in the first 500 miles of use. Depending on the weight of the car, new springs can have a slight arch, sit flat or have a slightly reversed arch. This is normal. The spring is acting as it should. Also, parallel leaf springs are almost never perfectly parallel. It is just a name for this type of suspension. Major auto makers have used these parameters for springs in many different models. These concepts are well proven and will produce no problems whatsoever. We do not recommend hard bushings of any kind for springs. Rubber bushings will absorb vibrations and road noise and allow for some flexing, an ideal combination here.

Part TypeSuspension Kit
BrandCHASSIS ENGINEERING INC.
Package Height8.0
Package Width8.0
Package Length48.0
Weight119.0 PG
Part CategoryPerformance Parts
Part FitmentSemi Universal
Vendor Part NumberAS-1020CG
Package Qty1
Package TypeEA
No Questions
No Reviews
Items You Need

![Penetrating Oil [11 oz. Aerosol Can]](https://www.jegs.com/images/mini_200/600/639/639-11043.jpg)
![Breaker Bar [1/2 in. Drive, 30 in. L]](https://www.jegs.com/images/mini_200/500/555/555-w32126.jpg)
JEGS
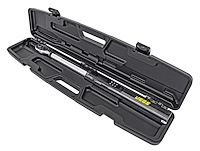
1/2 in. Drive Digital Torque Wrench for Fastener Tightening and Disassembly Torque Detection
Part Number : 555-81694
$17599
![Rolling Work Table [200 lb. Capacity]](https://www.jegs.com/images/mini_200/500/555/555-81420.jpg)

![Brake and Parts Cleaner [14 oz. Aerosol Can]](https://www.jegs.com/images/mini_200/500/555/555-72312.jpg)
![Heavy-Duty Nitrile Gloves [7 mils Thick, Large]](https://www.jegs.com/images/mini_200/500/555/555-1124.jpg)
![Wheel Chock [Solid Rubber]](https://www.jegs.com/images/mini_200/500/555/555-w41001.jpg)
Some parts are not legal for use in California or other states with similar laws / regulations