


 Order Status & Returns
 Gift Cards
 Help Center
 1-800-345-4545

 Vehicle Info Needed
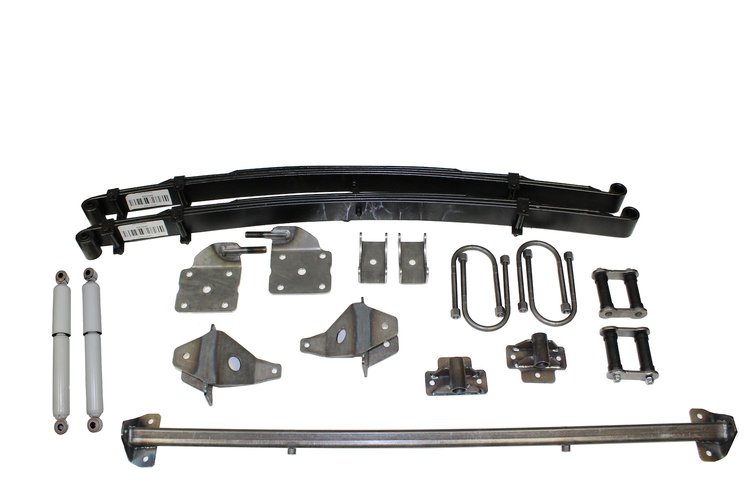
AS-1014CGY Complete Leaf Spring Rear End Mounting Kit for 1948-1954 Chevy and GMC Pickup Truck (Gas Shocks)
 Ships on Sep 14, 2026
 Lowest Price Guarantee
- Complete Leaf Spring Rear End Mounting Kit
- For 1948-1954 Chevy and GMC Pickup Truck (Gas Shocks)
Chassis Engineering AS-1014CGY Features:
AS-1014CGY Complete Rear End Mounting Kit for 1948-1953 Chevy and GMC Pickup Truck (Gas Shocks)
Bolt-On Complete Read End Mounting Kit for the 1948-1953 Chevy pickup. Kit fits a wide variety or rear ends up to 3 in. axle housing diameter depending upon the wheel off set and your tire choice.
Front Spring Mounts
Rear Spring Mounts
Upper Shock Miunts
Lower Shock Plates can be mounted with angle up or down for clearance and to get the perfect fit
Gas Shocks
Shackles
U-bolts
Spring Pads
Rear Slider Springs 2-1/2 in. wide
Hardware & Instructions shipped in 3 boxes.
When ordering please specify type of rear end that you will be using.
Prevent your suspension from bottoming-out and expensive vehicle damage by including a pair of adjustable rubber snubbers with your order.
For use with AS-1014CY Complete Rear End Mounting Kit for 1948-1954 Chevy Truck.
Chevy V8 Motor Mount
Chassis Engineering Installation Instructions for Rear End Leaf Spring Kit for 1948-1953 Chevy Truck and GMC Truck (1/2 tOn)
This kit works with a variety of different rear-end choices. When you order, please specify which rear end you will be using.
While a sway bar is not required, we recommend our SB-4854RA rear sway bar as a companion to this rear end mounting kit for a nicer driving experience.
Installation Steps:
Step 1: Remove the 4 original rear spring mounts by drilling out the rivets.
Be careful as some of these holes are reused. Also remove the original shock absorbers.
Step 2: Front spring mounting:
Make sure the bottom frame lip is 90 degrees to the frame where the front mount bolts on to. Straighten it if needed.
The original mount used 2 rivets through the bottom frame lip, the rear most hole now matches the front hole in the new mount.
Using this matching hole, bolt the new mount lightly in place.
Clamp and drill second mounting hole in the bottom of the frame.
Tighten both bolts. This leaves one hole to drill through the upright brace inside the frame.
Drill the last hole only after the mount is otherwise bolted in place.
Drill to 11/32 in. There may be a space between the upright brace and the inner frame.
Use spacers to fill the gap. Bolt it upright to the frame.
Caution: do not use a bolt to pull it to the frame, use the spacers.
Step 3. Rear spring mounting: The new rear spring mount uses the same holes as the old mount. Locate and bolt new mounts to the frame.
Step 4. Install spring and shackles (the front of the spring is heavier and has 2 clamps):
Step 5. Set the rear end over the springs. (Rear end should have old pads removed).
Set new spring pads in place and install lower shock plate and U-bolts. Center the rear-end and tighten lightly.
Step 6. To determine spring spacing, measure right to left across the front of both springs, then the same at the back.
Average these 2 numbers and that is the width of the spring pads. Be sure the outer spring distances to hub is the same on both sides.
We recommend putting weight on the springs before setting pinion angle. Set angle for 1 or 2 degrees less than the transmission angle.
If you want to guess at the pinion angle, the rear-end can be set up a 4 degrees upward pinion angle and 40 7/8 in. center to center between spring pads. You can do this without installing the rear-end in the car. The angle can be adjusted later with spring wedges if needed/
Spot-weld the pads to the rear end then remove rear and weld pads. Reinstall rear-end and tighten U bolts.
Shock Mounting
Step 1. The shock bar goes inside the frame and behind the rear-end. Mark the location on the edge of the frame and remove the bar.
Flip bar side to side (keeping front of bar to front) and clamp bar to bottom of frame using location marks previously set.
Center side to side on the frame and drill 11/32 in. holes through the frame using the mounting flanges as guides.
Step 2. Reinstall bar on correct location inside frame.
Insert 4 bottom bolts and tighten.
Drill the top holes from inside the frame using mounting flange for guide.
The bar is about 3/16 in. narrower than the frame, for easier installation. Use 1/2 in. flat washers, between each mounting flange and frame to make up for the distance. Install 2 top bolts and tighten.
Step 3. Install wheels to put weight on the springs, then install the shocks and washers and tighten.
Step 4. Move the original rubber stop 2 inches to the rear.
Rear end is centered in the fender opening now. It wasn't before.
Caution: Install rubber stops (not included in kit) between frame and rear-end to prevent shock bottoming.
Items You Need
![Penetrating Oil [11 oz. Aerosol Can]](https://www.jegs.com/images/mini_200/600/639/639-11043.jpg)
![Breaker Bar [1/2 in. Drive, 30 in. L]](https://www.jegs.com/images/mini_200/500/555/555-w32126.jpg)
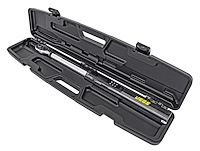
JEGS
1/2 in. Drive Digital Torque Wrench for Fastener Tightening and Disassembly Torque Detection
Part Number : 555-81694
![Rolling Work Table [200 lb. Capacity]](https://www.jegs.com/images/mini_200/500/555/555-81420.jpg)

![Brake and Parts Cleaner [14 oz. Aerosol Can]](https://www.jegs.com/images/mini_200/500/555/555-72312.jpg)
![Heavy-Duty Nitrile Gloves [7 mils Thick, Large]](https://www.jegs.com/images/mini_200/500/555/555-1124.jpg)
![Wheel Chock [Solid Rubber]](https://www.jegs.com/images/mini_200/500/555/555-w41001.jpg)