Sign up now to join the JEGS email newsletter and be the first to learn about new products, special deals and e-mail only offers!

 102 People Found This Article Helpful
Key Takeaways
Shop All Brake Kits And Components

JEGS Tech Specialist
Pete Mitchell
Yes, you can convert your rear drum brakes to disc brakes, and from a safety perspective, it's a great idea. Disc brakes offer superior stopping power and are less likely to fade in hot weather or when towing a heavy load.
There are a few different ways to handle a drum to disc brake conversion. One option is to buy a classic car disc brake conversion kit from JEGS. A complete kit makes the installation much easier and ensures all of the necessary components are included.
Another option is to buy the individual components and install them yourself. This approach will likely cost more, but it lets you customize the brakes to better suit your needs.
No matter the direction you take, JEGS is here to help with a wide selection of front disc brake kits, rear disc brake conversion kits, and all the individual components you need to get the job done right.
Below, you'll learn what you need, how to install a rear disc brake conversion kit, and which mistakes to avoid.
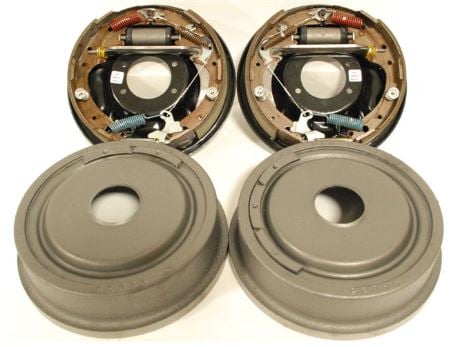
Rear drum brakes were commonly used on vehicles until the late 1970s, when disc brakes became the popular choice. Drum brakes consist of a cylinder (drum) that houses a set of brake shoes.
When you press the brake pedal, hydraulic pressure forces the shoes outward against the drum. This contact creates friction, which slows or stops the rotation of the drum and, ultimately, your vehicle.
The catch is that the drum is an enclosed design. It traps heat during repeated hard stops, and that heat buildup is what causes brake fade.
Sign up now to join the JEGS email newsletter and be the first to learn about new products, special deals and e-mail only offers!
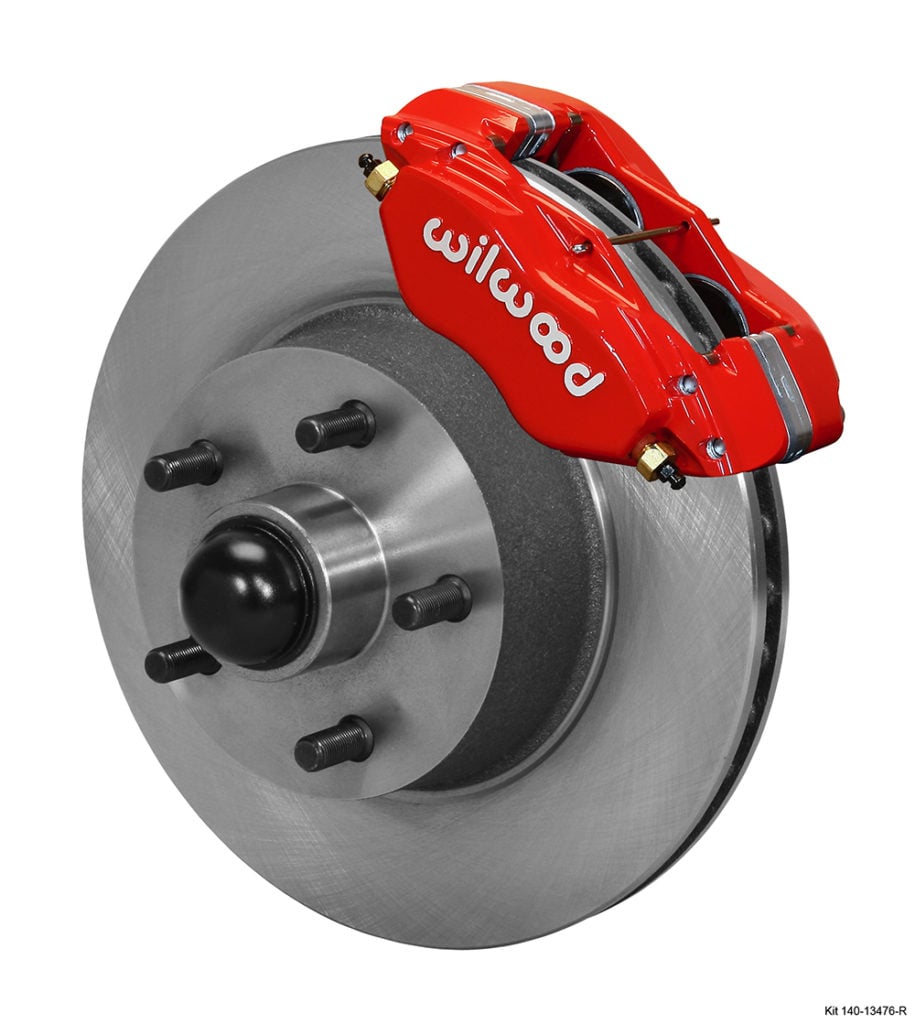
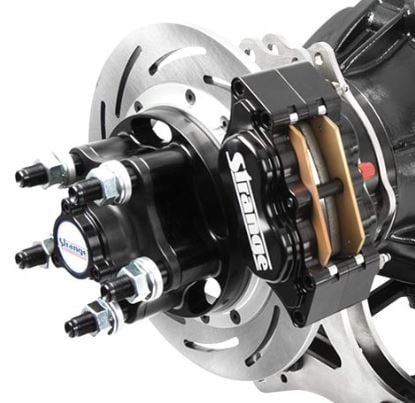
Disc brakes are the better option when it comes to stopping power and fade resistance. A disc brake system consists of a rotor (disc), caliper and pads.
When you press the brake pedal, hydraulic pressure forces the caliper pistons to push the pads against the rotor. This contact creates friction, which slows or stops your vehicle much quicker than drum brakes.
Because the rotor is out in the open, it sheds heat and water faster than an enclosed drum. That's why discs stay consistent through repeated stops and in the rain.
There are a few factors to consider when deciding whether to convert your rear drum brakes to disc brakes. The most important thing to keep in mind is safety.
Disc brakes offer superior stopping power and are less likely to fade. If you do a lot of driving in stop-and-go traffic or live in an area with hilly terrain, disc brakes are a must.
Another consideration is cost. A classic car disc brake conversion kit can be expensive, but when you're talking about safety, there's no putting a price tag on that.
If you're handy with tools and comfortable working on your vehicle, you can save some money by buying the individual components and installing them yourself. Here's a side-by-side look at the differences between drum and disc brakes.
| Factor | Drum Brakes | Disc Brakes |
|---|---|---|
| Stopping power | Adequate for light street use | Stronger, more consistent stops |
| Heat and fade | Enclosed drum traps heat, so it fades sooner | Open rotor sheds heat and resists fade |
| Wet weather | Slower to shed water | Sheds water quickly |
| Service and maintenance | More springs and hardware; may need periodic adjustment | Simpler pad swaps; self-adjusting |
| Parking brake | Built into the shoes | Integrated caliper or a small drum inside the rotor hat |
| Typical use | Rear axles on older and economy vehicles | Front and rear on most modern and performance vehicles |
Drum vs. disc brakes: a general, qualitative comparison. Results vary by vehicle, components and setup.
Be honest about how you drive. For street use, your rear brakes typically provide around 30% of the stopping power, so the fronts do most of the work.
That means a rear disc brake conversion pays off most if you've added power, tow, drive in hills or sit in heavy stop-and-go traffic. If your car still has front drums, convert the front first.
It's also worth doing while the rear end is already apart. If you're pulling axles or rebuilding the housing anyway, you'll save yourself a second teardown.
Gather everything before you pull the car apart. Here's what most rear conversions call for.
Parts
Tools
Most fitment problems start before the box ever shows up. Confirm these details first:
Not sure what you have? Call the JEGS tech line at 1-800-345-4545 and we'll help you narrow it down.
With a little research and determination, converting your rear drum brakes to disc brakes is a relatively easy process. If you buy a complete kit, all of the necessary components and instructions will be included.
Use the steps below as a general roadmap. Your kit's instructions always take priority for your specific application.
Park on a flat, solid surface and chock the front wheels. Loosen the rear lug nuts, then lift the rear of the car with a floor jack.
Support the car on jack stands before you put any part of your body under it. Never rely on the jack alone. Once the car is secure, remove the rear wheels.
Start by removing the rear drums, brake shoes, backing plates, and all associated hardware. Pro tip: spray each nut and bolt with penetrating fluid before attempting to remove them. This will help to loosen any rust or corrosion that may have built up over time.
Disconnect the parking brake cable from the shoes. Then use a flare-nut wrench to disconnect the hard line from the wheel cylinder without rounding the fitting.
Once the drums and shoes are removed, you'll need to clean up the area and make any necessary repairs, like replacing rusted-out hardware.
While you're in there, check the axle seals and bearings for leaks or play. A leaking seal will soak your new pads, so replace it now if there's any doubt.
In many cases, the axles will need to be removed from the rear differential housing in order to install the caliper mounting brackets. If an axle is damaged or has the wrong bolt pattern, now's the time to install replacement axle shafts.
If your rear end uses C-clip axles, you'll need to remove the differential cover to get to the clips. Drain the gear oil first, and refill it to the correct level once the axles and cover are back in place.
The next step is to install the new disc brakes. If you're using a kit, follow the included instructions. If you're piecing the system together yourself, be sure to consult a professional or reference a reliable source for guidance.
Bolt the caliper brackets to the axle housing and torque them to spec. Slide the rotors on and make sure each one seats flat against the axle flange.
Install the pads and mount the calipers on the brackets. Make sure each caliper is on the correct side so the bleeder screws sit at the top of the caliper.
If the bleeders point down, you won't be able to get the air out. Connect the flex hoses to the calipers and hard lines, and check that they clear the suspension through its full travel.
Switching to 4-wheel disc generally calls for a disc/disc master cylinder. A drum/drum or disc/drum unit isn't designed for the fluid volume and pressure that rear calipers need.
Install an adjustable proportioning valve in the rear brake line. It lets you fine-tune front-to-rear bias and prevents premature rear lockup.
Hook the parking brake cables to the kit's parking brake mechanism. Depending on the kit, that's either an integrated caliper or a small drum inside the rotor hat.
Adjust the cables per the kit instructions so the brake holds the car without dragging when released.
Fill the master cylinder with fresh fluid. Start bleeding at the wheel farthest from the master cylinder, then work your way to the closest one.
Keep the reservoir topped off so you don't pull air back into the system. Repeat until the fluid runs clear and bubble-free, and you have a firm pedal.
For a detailed walkthrough, see our guide on how to bleed your brake system.
Follow the pad manufacturer's bedding procedure to transfer an even layer of pad material to the rotors. This gives you smoother, more consistent stops.
Test drive in a safe, open area first. Check for pulling, rear lockup or dragging, then adjust the proportioning valve if needed.
Most conversion headaches come from the hydraulics and fitment. Watch for these:
The added width depends on rotor-hat thickness and bracket design, so check your wheel offset before ordering. On late-model ABS cars, plan for custom fabrication.
Another option is to buy the individual components and install them yourself. It'll likely cost more, but you get to customize the brakes to better suit your needs.
A complete disc brake conversion kit is the simpler path. The parts are matched to each other, and you won't be chasing down a missing bracket or hose halfway through the job.
JEGS carries kits from brands such as Wilwood and Right Stuff. Right Stuff rear disc conversions are popular on GM 10- and 12-bolt and Ford 9-inch rear ends. If you're deciding between brands, our Wilwood vs. CPP brakes comparison breaks down the tradeoffs.
Here's what kits typically cost at JEGS:
Typical Disc Brake Kit Price Ranges At JEGS
| Kit Type | Typical Price Range |
|---|---|
| Front conversion kits | $300 to $800 |
| Rear conversion kits | $250 to $700 |
| High-performance kits | $1,000 and up |
Typical kit price ranges as published on JEGS's disc brake category pages. High-performance kits with larger rotors and multi-piston calipers can exceed $1,000.
If you piece it together, add up the calipers, rotors, brackets, hoses, master cylinder and valve before you decide. Those individual parts often total more than a matched kit.
Converting your rear drums to discs gives you stronger, more consistent stops with less fade. Check fitment first, upgrade the master cylinder and proportioning valve, and bleed the system carefully. A rear disc brake conversion kit makes the job far simpler.
With so many kits and components on the market, choosing the right one for your vehicle can be a challenge. Luckily JEGS experts are here to help. Give us a call or visit us online for assistance finding the perfect disc brake conversion kit for your application.
Shop All Brake Kits And Components
Most classic rear-wheel-drive cars and trucks can convert drum brakes to disc with a bolt-on kit and the right disc brake parts. Late-model cars with integrated ABS or stability control may need custom fabrication instead.
Usually, yes, since switching to 4-wheel disc generally calls for a disc/disc master cylinder. Our brake master cylinder FAQs cover the details.
Yes, since an adjustable proportioning valve fine-tunes front-to-rear bias and prevents premature rear lockup. You'll find options under proportioning valves and line locks.
At JEGS, rear kits typically run about $250 to $700 and front kits about $300 to $800. High-performance kits with larger rotors and multi-piston calipers can exceed $1,000, and any brake lines and fittings add to the total.
It's a moderate DIY job you can handle with hand tools, jack stands and basic brake system tools. Some kits require pulling the axles, and you'll always need to bleed the system.