Sign up now to join the JEGS email newsletter and be the first to learn about new products, special deals and e-mail only offers!

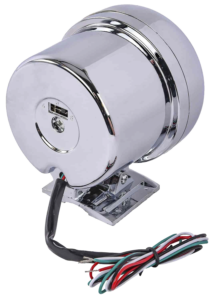
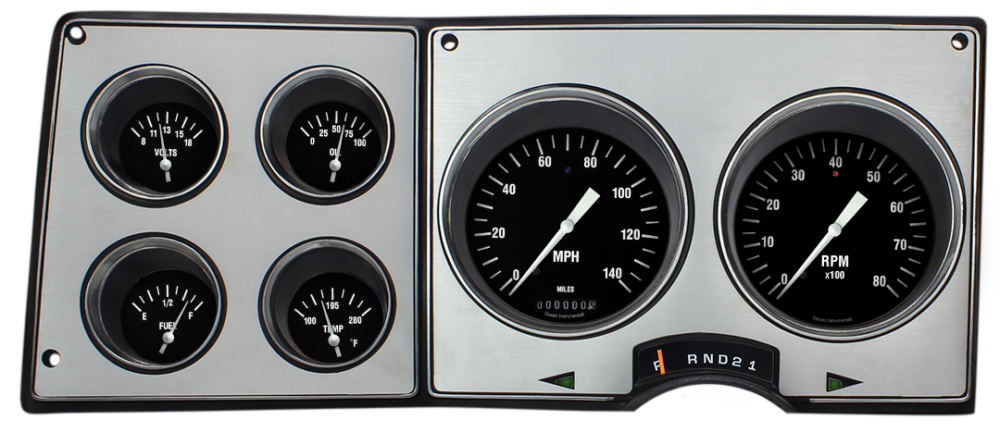
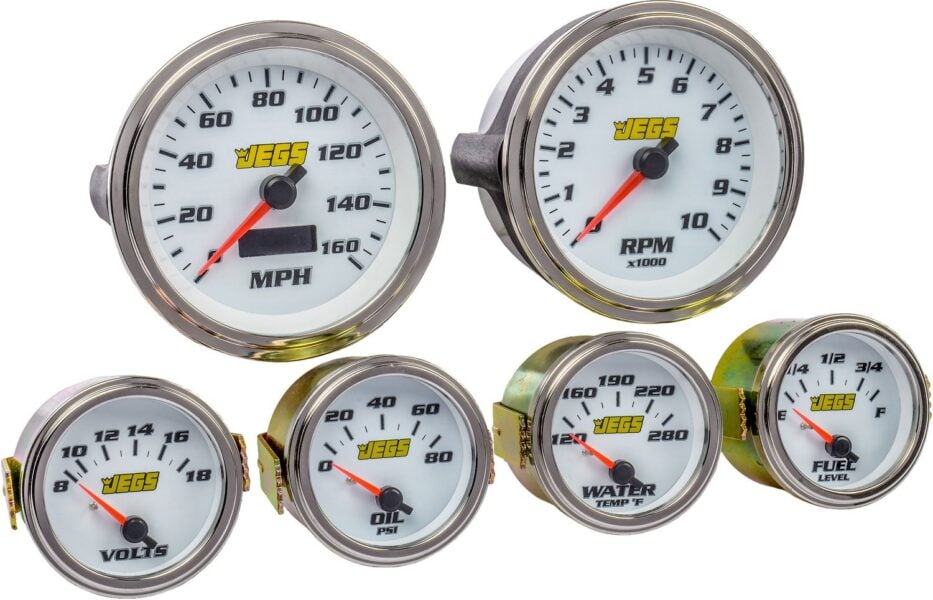
A tachometer, often referred to as a "tach," is a gauge that measures and displays engine speed in RPMs (revolutions per minute). Understanding engine RPMs is crucial for various purposes, including setting idle speed, diagnosing engine performance issues, defining a rev limit, knowing the engine's redline, determining engine revolutions at specific vehicle speeds, and more. Tachometers receive an electrical pulse signal from sources like the negative side of the ignition coil, the engine's ECM/computer, or an aftermarket ignition control box. They convert this signal into a mechanical or digital display on the gauge face. Most tachometers come with instructions on how to install them, simplifying the assembly process.
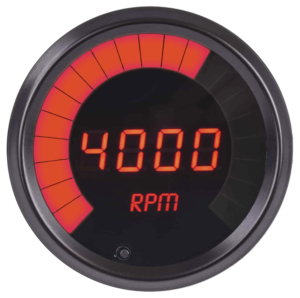
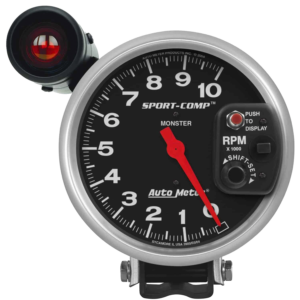
The market offers a variety of tachometers with different features, allowing you to choose one that suits your needs. When selecting a tachometer, consider factors such as size, color, style, compatibility with your engine's number of cylinders, and signal input. Tachometers may also include additional features like a shift light, which activates at a specific RPM you set, and RPM recall, which records the highest RPM achieved until reset for review. Other options are available depending on the brand and style of tachometer.
Gather the Required Materials:
Choose the Mounting Location:
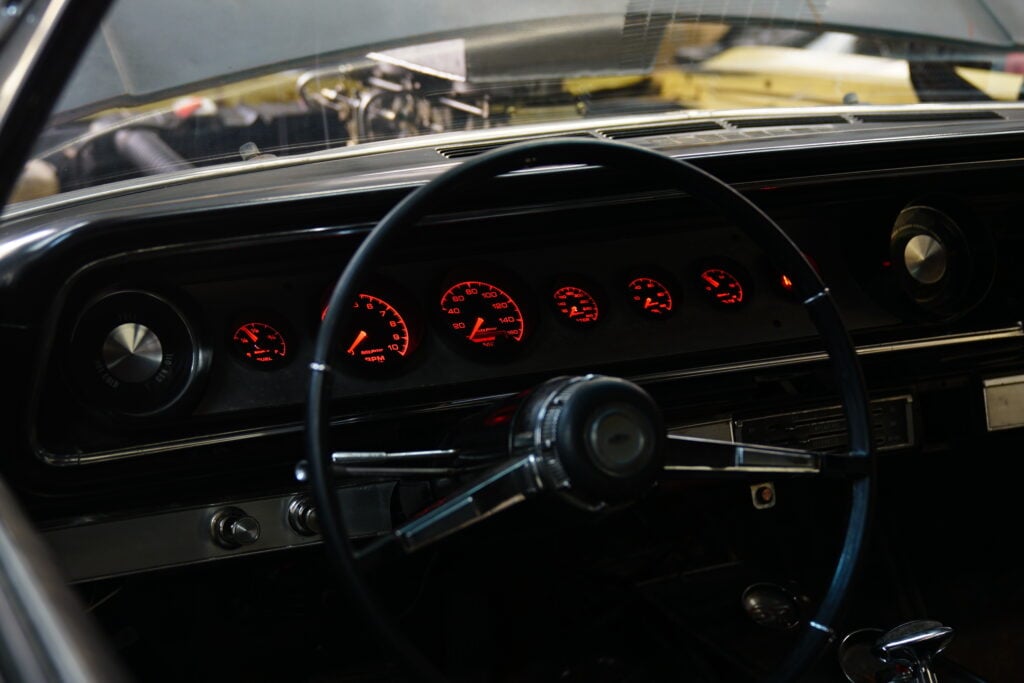
Select a suitable location on your vehicle's dashboard, steering column, or instrument cluster to mount the tachometer. Some people prefer mounting it directly to the hood with a waterproof housing or on the console. Tachometers often come with pedestals that allow for secure bolting or screwing in place, whether on top of or under the dash. Some tachometers are designed to mount directly into the dash through a pre-cut hole.
Ensure that the chosen location provides clear visibility while driving and does not obstruct essential gauges or controls.
Prepare the Mounting Surface:
Thoroughly clean the mounting surface to remove dirt, debris, or grease.
Use a template provided with the tachometer to mark the mounting holes if necessary.
Install the Mounting Bracket (if applicable):
Follow the manufacturer's instructions to install the mounting bracket securely to the surface.
Use provided screws or hardware to fasten the bracket in place.
Connect the Wiring:
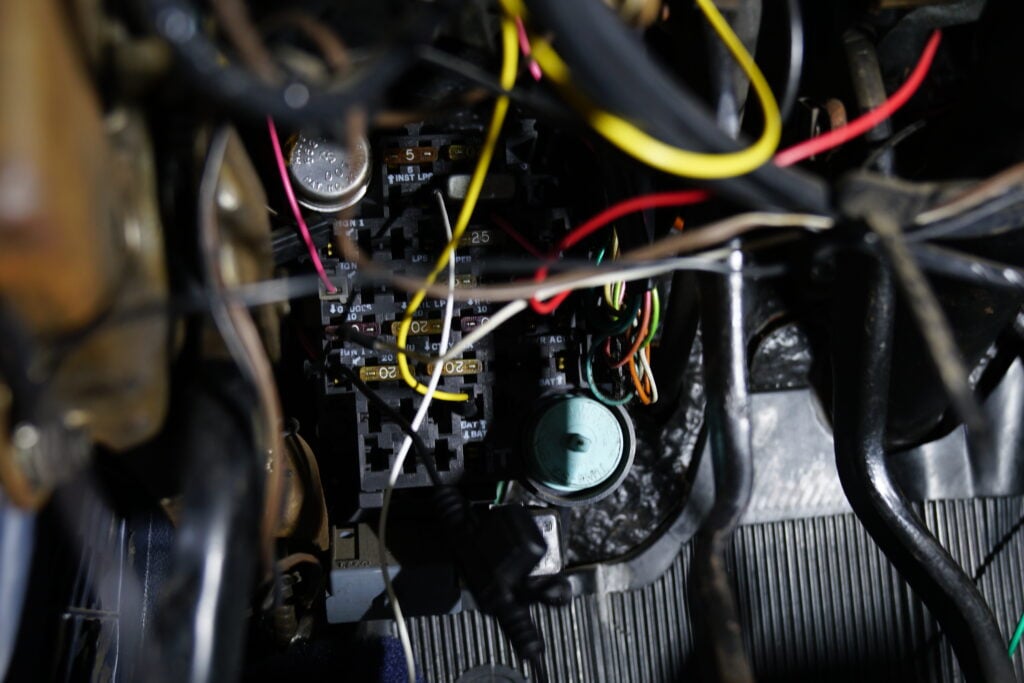
Refer to the wiring diagram or instructions provided with the tachometer and consult your vehicle's wiring diagram.
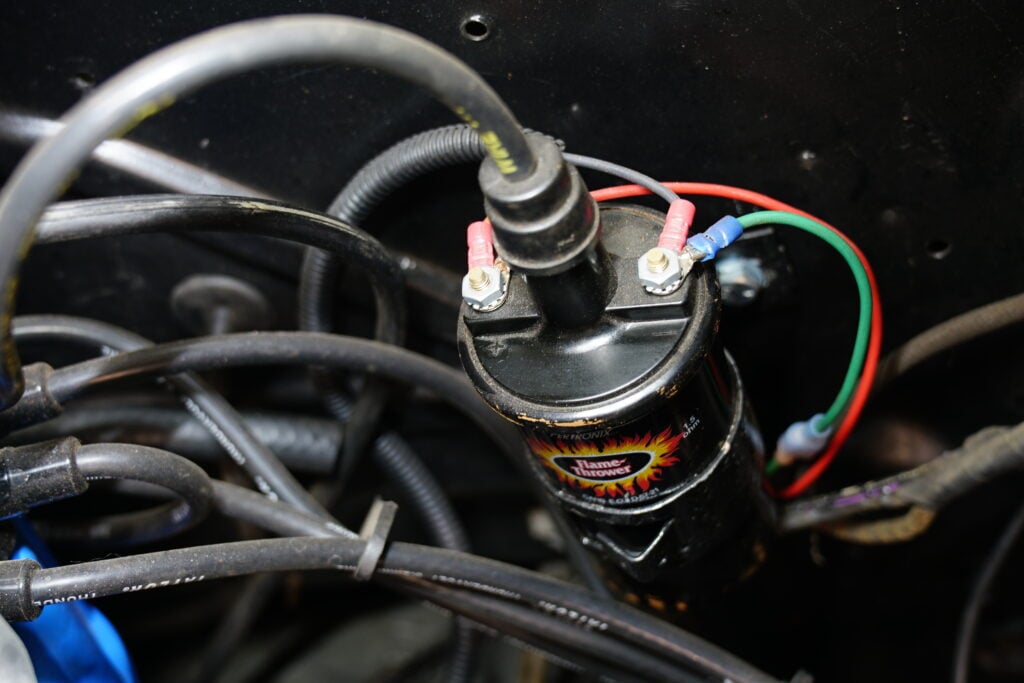
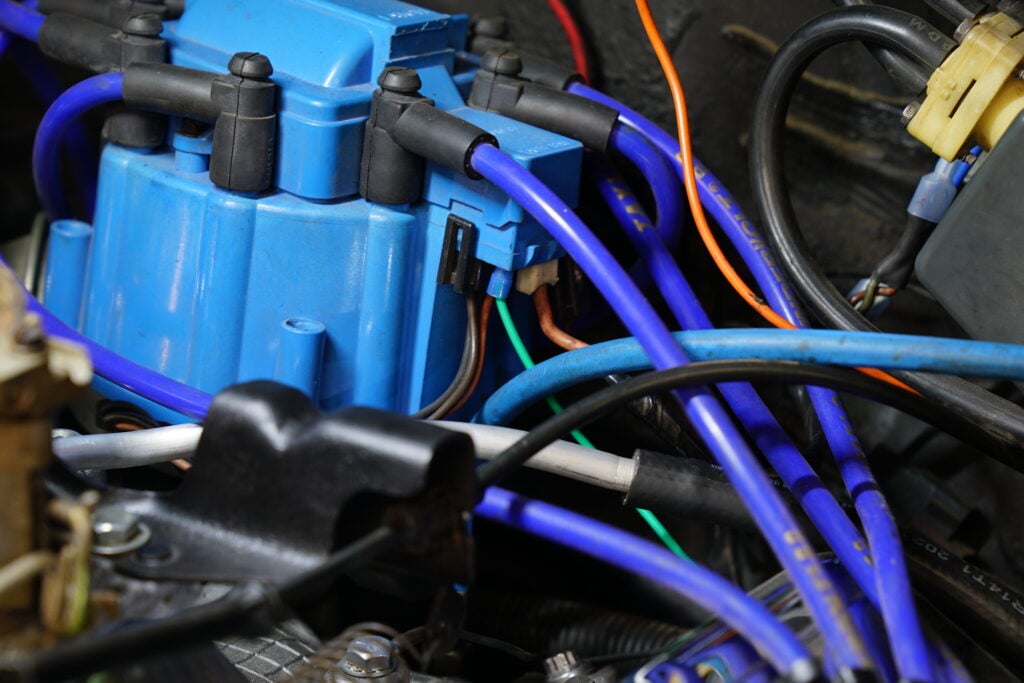
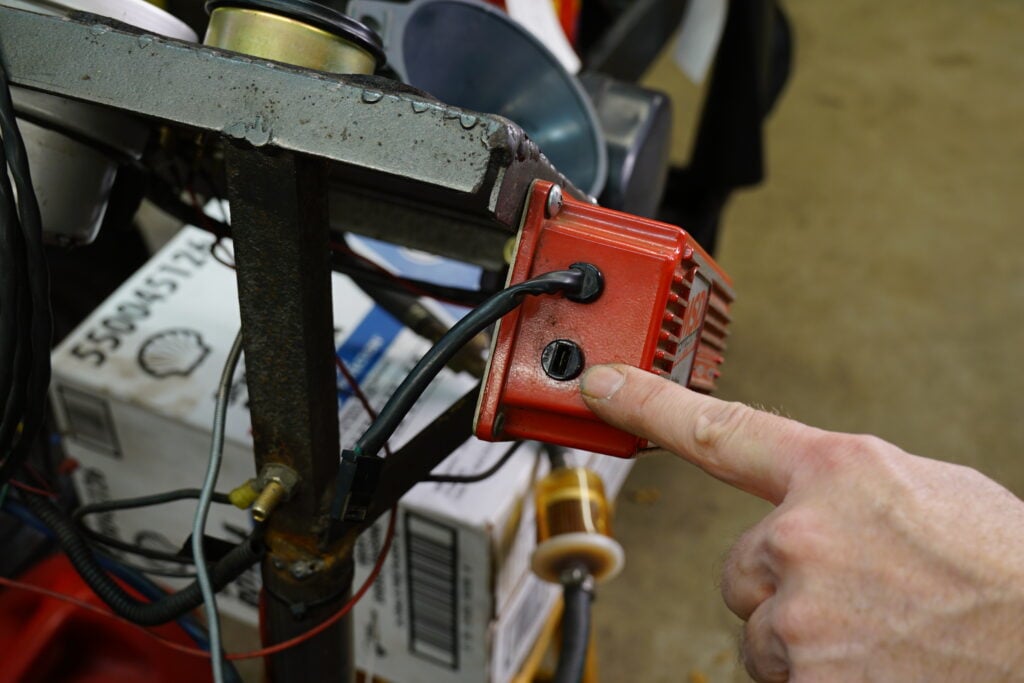
Identify the ignition coil or ignition system wire where the tachometer signal will be tapped into.
Connect the tachometer signal wire to the appropriate wire in your vehicle's wiring harness.
Establish a secure connection using wire connectors, soldering, or recommended methods.
Connect the Power and Ground Wires:
Identify a suitable power source that receives power when the ignition is on, like the fuse box or ignition switch.
Connect the tachometer's power wire to the chosen power source using an appropriate fuse or circuit protection.
Locate a suitable ground point near the tachometer mounting location.
Securely connect the tachometer's ground wire to the vehicle's metal chassis or grounding point.
Secure and Route the Wiring:
Use zip ties or other suitable methods to secure the wiring, preventing loose or dangling wires.
Carefully route the wiring to avoid interference with moving parts and maintain the driver's view.
Test the Tachometer:
Start the vehicle and ensure that the tachometer functions correctly.
Observe the tachometer readings as you rev the engine to confirm accurate RPM measurements.
Finalize the Installation:
Double-check all connections, ensuring they are secure and free from loose wires.
Adjust the tachometer's mounting angle or position if necessary for optimal visibility.
Reinstall any panels or trim pieces removed during the installation process.
Test and Verify Operation:
Take your vehicle for a test drive to ensure the tachometer functions correctly under various driving conditions.
Verify that the tachometer readings align with your vehicle's RPM range and engine performance.
Please note that these instructions serve as general guidelines, and the specific installation process may vary based on your vehicle's make and model and the tachometer you are installing. Always consult the manufacturer's instructions and wiring diagrams specific to your tachometer and vehicle for a proper and successful installation.
Sign up now to join the JEGS email newsletter and be the first to learn about new products, special deals and e-mail only offers!
Tachometers typically receive their signal from specific sources such as the negative side of the ignition coil, the engine's ECM/computer, or an aftermarket ignition control box. Understanding where the tachometer gets its signal is crucial for correct installation.
Testing a tachometer's functionality involves starting the vehicle and confirming that it accurately displays RPM readings as you rev the engine. Ensuring the tachometer works correctly is essential for accurate engine performance monitoring.
When connecting a tachometer, it's essential to use the right wiring connection. Options include soldered connections with heat shrink tubing, butt connections with crimping, quick-release connections with male and female clip ends, and twisting wires together with electrical tape or wire nuts. Choosing the appropriate connection method ensures a secure and reliable installation.

Most tachometers come with instructions that include a wiring diagram. If you don't have the instructions, you can determine your tachometer's brand and type and search online for a corresponding wiring diagram. Each brand and model may have unique wiring connections.
If you don’t have the instructions for how to install a tachometer that were included, and you are unable to contact the manufacturer for the instructions, some guesswork will be required to complete the connections (Autometer tachometer wiring, for example) and great care will have to be given so as not to damage the tachometer or the vehicle's systems and components. It is not recommended to guess as it may cause damage to the tachometer, coil, ignition box, or vehicle wiring and components, so keep this in mind if you choose to proceed further.
Hooking up a tachometer wiring harness: In most cases,
If there are any additional wires in the tachometer wiring harness, you will need to determine the manufacturer of the tach and reach out to them for proper wiring instructions. A JEGS technical support specialist can also help you with identification and installation.
Leave a Reply