When you are diagnosing an engine issue or rebuilding a motor, there is a group of important specialty and engine rebuild tools you need to have in your tool box. Before deciding to tear down an engine and rebuild it, knowing the vehicle's compression and leak down info can help with preventing unnecessary repairs. When a rebuild is necessary, having the right tools to help with the installation of pistons and improving cylinder head flow will help provide the performance you need. Below are five of the must-have engine rebuild tools for your car:
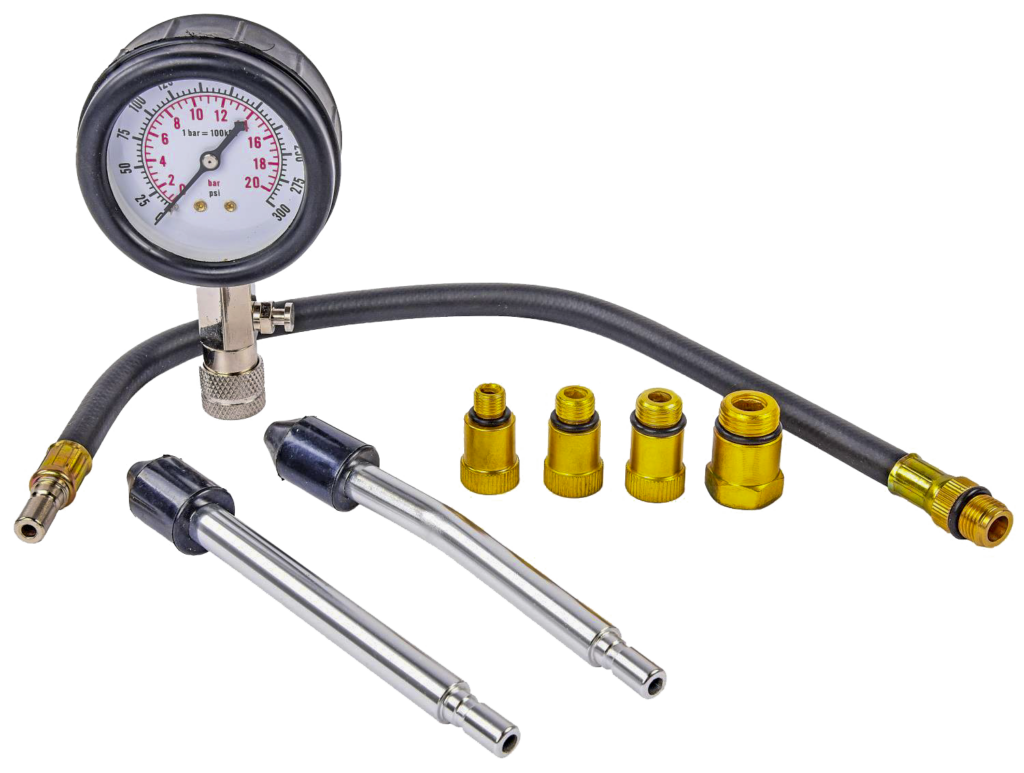
Compression Tester
One of the most common diagnostic engine rebuild tools, the compression tester helps to let you know the condition of internal engine parts such as piston rings, valves and valve seats as well as if they are sealing properly. It also allows you to compare each cylinder to identify a potential problem. The correct pressure range can change from engine to engine. However, in general, good-running engines should have compression over 100 psi in each cylinder and the highest and lowest recorded reading should be within 10% of each other. To use a compression tester, the engine needs to be able to crank over up to 10 full revolutions with the ignition and fuel systems disabled to prevent startup. The tester is threaded into each spark plug hole, one at a time during the cranking process. The reading is then recorded for each cylinder to compare once all cylinders have been tested and the psi has been recorded. If a reading less than 100 psi is observed, you can pour a teaspoon of engine oil into the spark plug hole and retest the cylinder. If it improves, the piston rings are most likely worn and need replaced. If the reading does not change, the valve or valve seat should be inspected, as they may be the cause.
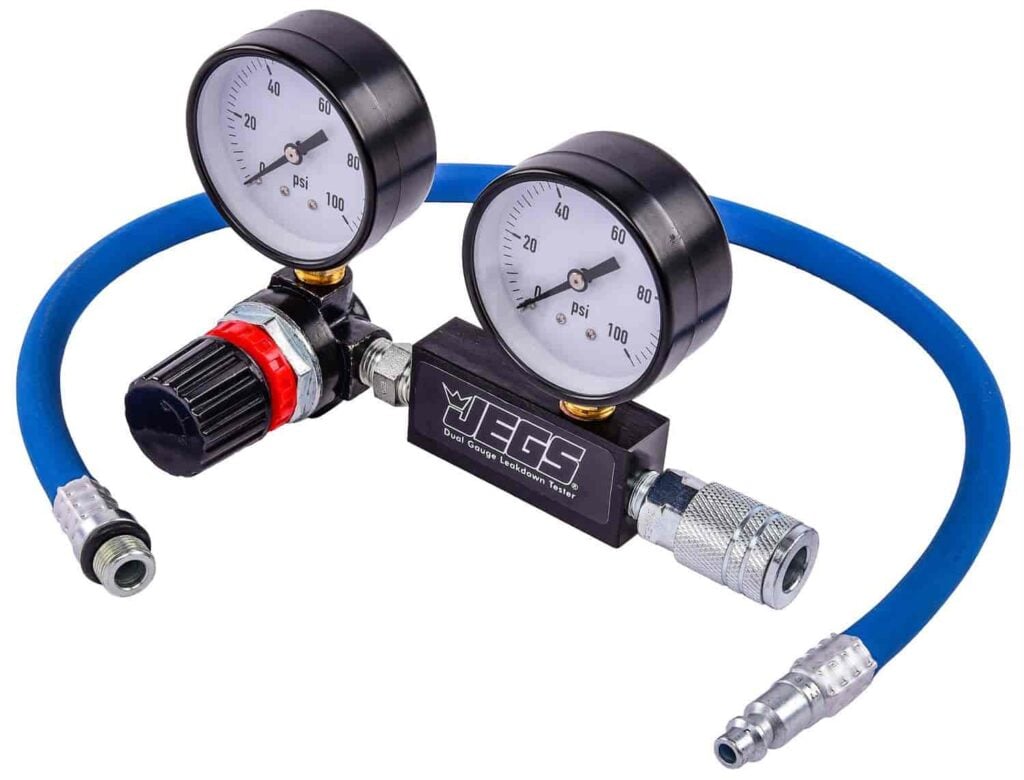
Leak Down Tester
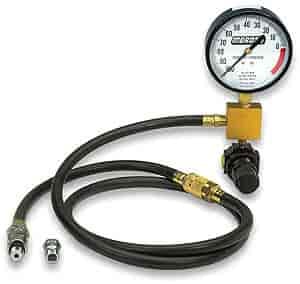
A leak down tester shows you how well each cylinder holds pressure by pumping air into it. They are made available in single or dual gauge designs. The added gauge in a dual gauge leak down tester shows the inlet pressure, which confirms you have the correct amount in the cylinder. The testing procedure needs to be done with a warm engine. A spark plug is removed from the cylinder you are testing and the engine hand turns until that cylinder is at top dead center. This will help to keep the air pressure from pushing down on the piston. This is also where the most cylinder wear will be and where the engine makes power. Ensure the gauge reads zero and then install the air fitting from the tester into the spark plug hole, applying the correct inlet pressure. Gently turn the crankshaft back and forth to keep the piston around top dead center, so that the piston rings are properly seated in the cylinder.
For most non-nitrous/supercharged/turbocharged engines, the leak down results should be anywhere from 8-12 percent and variation within 4-5 percent of each other. Leaks will happen at the head gasket, piston rings, or valves (intake and exhaust). If you notice a big difference from one cylinder to another, you can listen for the air pressure from the tester in the cylinder. If you hear a hissing sound from the tailpipe, a faulty exhaust valve may be to blame. If you open the throttle blades and hear the hissing sound from the intake, the intake valve for that cylinder may be the culprit. If you hear hissing from the dipstick tube or valve cover breather hole, piston rings may need to be replaced.

Piston Cylinder Honing Tool
Piston cylinder honing tools are engine rebuild tools that clean up the cylinder walls by spinning via a connection to a drill. The honing stones provide a “cross-hatch” of tiny scratches that soften the wall surface. The piston rings will then wear away any imperfections and create a perfect seal as they wear in. Once the correct size cylinder honing tool is purchased, it is dipped in engine oil first, and then oil is poured into the cylinder, around the walls as they are honed.
A catch can is set up below the block with a damp towel to help trap any mental shavings, and so that the oil can be reused again. The hone is spun around approximately 1,400 rpms by the drill in the cylinder in and out several times until the walls look nearly shiny with cross hatch marks. When this is achieved, reverse the drill and repeat the process until you can see cross hatch marks. Last, with a damp rag, check your work and clean the cylinders. As a last step, a layer of “machinist oil” can be added to prevent corrosion.

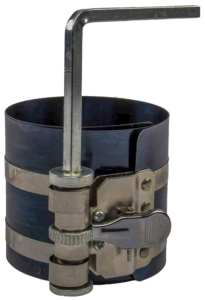
Piston Ring Compressor
One of the most important engine rebuild tools, a piston ring compressor allows for the installation of the piston rings onto the pistons as they are installed into the cylinders. There are two main types: a tapered design and a clamping style. The tapered design is made for the specific bore you have and as the piston ring moves further down into it, it is compressed where it can then slide into the engine bore. The other style, an adjustable compressor, can be tightened down, compressing the rings into the piston grooves. This version is compatible with more than one bore, but takes a little more care in compressing the rings. When using the piston ring tool, the first step is to wipe the cylinder bores out and apply a small amount of non-synthetic motor oil to them. The piston rings and wrist pins should also be coated with conventional engine oil to help them pass through the piston ring compressor.
Finally, the piston ring compressor itself should be coated. Next, the crankshaft needs to be at top dead center for that cylinder and both the piston and the piston ring compressor needs to be correctly oriented. The connecting rod bolts need to be covered with either rubber hose or protection to prevent damage to the crankshaft or cylinder walls during installation. The connecting rod bearings need assembly lubricant applied to them as well. Last, the piston should be able to push down into the cylinder, while guiding the connecting rod over the crankshaft with light pressure or the light tapping with a dead blow hammer.

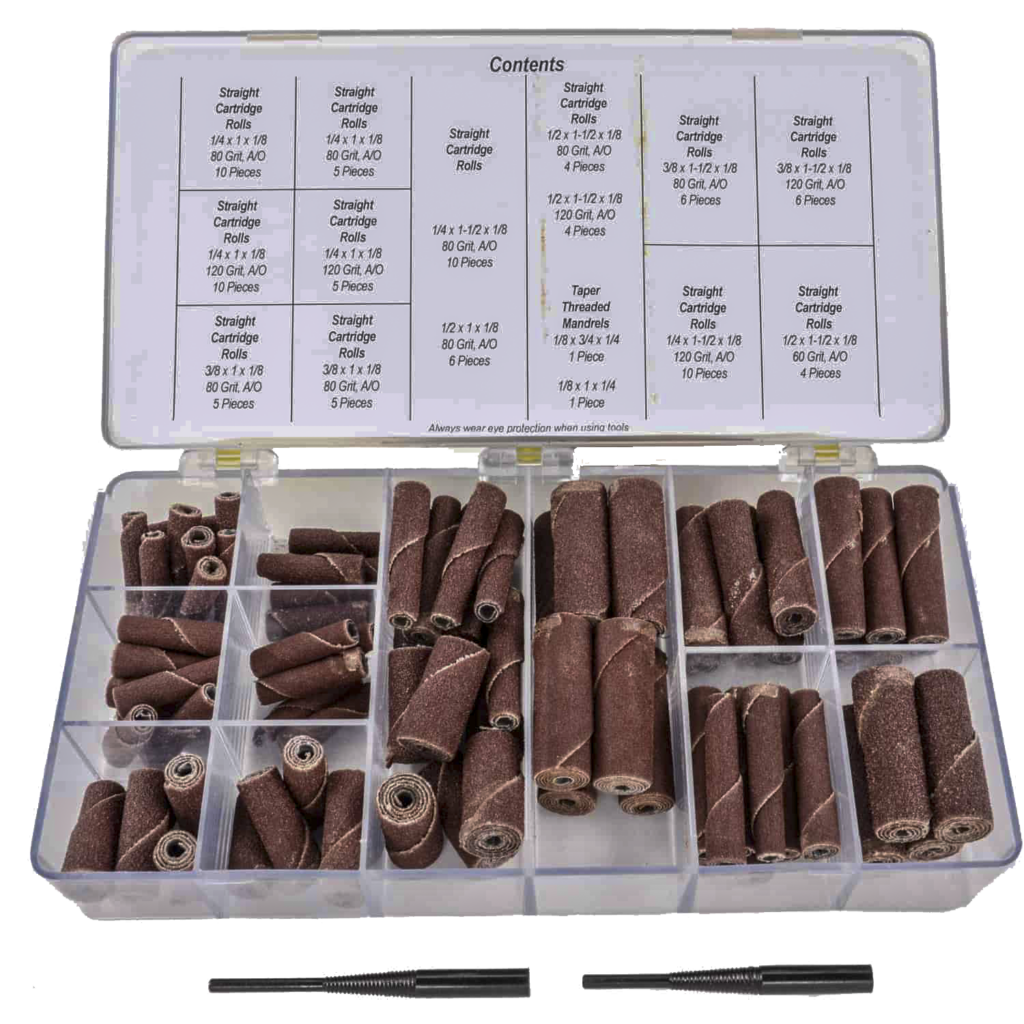
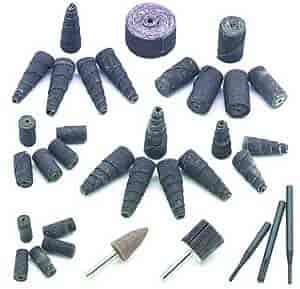
Port And Polish Kit
A port and polish kit allows you to improve airflow in the cylinder heads. Up to 30 horsepower can be added to the engine by properly porting and polishing heads. To port and polish the cylinder heads, they first need to be removed from the engine. Clean the cylinder heads with brake and parts cleaner and scrub with a Scotch-Brite pad if needed. Before beginning, inspect the heads for any cracks between valve seats, and replace the cylinder head if a crack is found. With the intake manifold gasket matched to the cylinder head, material can be removed from the intake port to match the gasket. By marking the area carefully the gasket can be removed to allow room for porting. Porting requires careful removal, as too much material removed is irreversible. An arrowhead or conical style stone bit works best and at around 10,000 rpm Dremel speed. The removal of material needs to be as even as possible, only going into the intake port about 1-1.5”. Be careful not to grind any areas near where the valve seats in the head. Any casting bumps or sharp edges within the area should be smoothed out.
It is important to make each port as identical as possible to the rest so that volume is the same. 40 grit cartridges work best for porting and 80 grit allow a nice smooth finish. Use the “flapper” from the port and polish kit to polish the inside of the runner. Again, just the first 1-1.5”. Next, repeat the same process with the medium grit buffer and then finally the fine grit buffer. Apply this method to both intake and exhaust runners. Next, polish the outlets of the runners and the chamber to deck areas. The last area to do on the cylinder head is valve lapping. Paint the perimeter of the valve seats with a temporary paint or marker. Apply the lapping compound to the base of the valve. Put the valve back in the original location and then spin the lapping tool between your hands as if you would to a stick when starting a fire. Do this for a few seconds and then pull the valve from the seat. If the valve and seat show a shiny ring, you can move on to the next cylinder. If a shiny ring is not present, most likely you have a bent valve that needs to be replaced. The final recommended step is taking the cylinder head(s) to a machine shop to be flow tested and confirm if any additional work is needed.